How to Embed a Video in a PDF and Level Up Your Study Notes
Feb 25, 2026

Let's be real, you can actually embed a video directly into a PDF. This simple move creates an interactive, all-in-one study guide that finally ends the chaotic juggle between lecture slides and a dozen open browser tabs. It’s a complete game-changer for exam prep.
Why Bother Embedding Videos in Your PDFs?

If your study routine involves scrolling through a massive PDF while trying to hunt down that one 30-second video clip your prof mentioned, you know the struggle. Toggling between windows is distracting and completely breaks your focus.
Embedding videos directly into your study notes fixes this by putting everything you need into one clean, organized space.
Imagine reading your chapter summary and, right next to a tricky concept, there’s a video of your professor explaining it. No more searching YouTube—just click and play. This method transforms your static notes into dynamic, genuinely useful study materials.
A Cheat Code for Your Memory
Combining text and visuals is basically a cheat code for how our brains work. Reading helps you grasp the details, but watching a video makes the concept stick. This combo caters to how we naturally learn, turning passive reading into an active learning session that actually helps you understand, not just memorize.
This isn't just a hunch; it’s backed by solid data. People retain 95% of a message when they watch it in a video, compared to just 10% when reading it in text. That principle is a huge advantage when you're trying to cram for finals.
The Ultimate Study Hack
Think about the time you'll save. Instead of juggling scattered files and links, you create a single, powerful study guide. This is especially clutch for those last-minute review sessions when every single second counts.
Here’s the glow-up your study notes get:
All-in-One Hub: Your notes, diagrams, and video explanations all live together in one document.
Active Engagement: Clicking on a video keeps you focused and physically involved with the material.
Context on Command: You can place explainer videos exactly where you need them most, right next to complex topics.
Offline Access: Properly embedded videos can work without an internet connection, perfect for studying on the go.
The modern study workflow is all about efficiency. With 85% of online course materials using PDFs, it’s no surprise students are looking for more integrated formats. If you want to dive deeper, check out some insights on how video marketing statistics prove this trend.
Ultimately, learning to embed video in a PDF is more than just a tech trick; it’s about studying smarter. When you centralize everything, you spend less time searching and more time actually mastering concepts.
For students who want to automate this whole process, tools like Vivora can instantly turn all your class content—PDFs, slides, and links—into organized, actionable study notes.
The Best Tools for Embedding Videos in PDFs
Alright, so you’re sold on the idea of leveling up your study notes, but which app should you actually use? There are a bunch of ways to embed a video in a PDF, and the best one for you really comes down to your budget, how comfortable you are with tech, and how much time you have before that next big deadline.
Let's walk through the main players, from the heavyweight champs to the free, get-it-done-now options.
The Pro-Level Powerhouse: Adobe Acrobat Pro
If you want the absolute most control and professional-grade features, Adobe Acrobat Pro is the undisputed king. This is the tool that lets you truly embed a video file right into the PDF for offline playback. You can even customize a "poster" image for the video and fine-tune exactly how it plays.
This is the perfect route if you’re building a major project, a digital portfolio, or a study guide you plan to share with a group. The main catch? It’s not free. But here's a pro-tip I always share: look for student discounts. You can often get the entire Adobe Creative Cloud suite for way less than the standard price.
Your Everyday Go-To: MS Word or Google Docs
Honestly, for a quick and simple method, you don't need fancy software at all. Just drop a link to an online video—say, from YouTube or a class recording on TikTok—into a Microsoft Word or Google Docs file.
When you export or save that document as a PDF, the link becomes clickable. While this doesn't technically embed the video for offline viewing, it’s a lightning-fast workaround for linking out to lecture recordings or handy explainer videos. It’s ideal for personal study notes when you know you'll have an internet connection.
The Free and Capable Alternative: LibreOffice
Don't want to shell out for an Adobe subscription? LibreOffice is about to become your new best friend. It’s a completely free and open-source office suite—think of it as a no-cost version of Microsoft Office—that has a surprisingly powerful PDF editor built right in.
Its "Impress" (their version of PowerPoint) and "Writer" (their version of Word) tools let you insert media files directly into a document before you export it as a PDF. It might take a little more getting used to than Word, but it gives you that true embedding power without the price tag.
Bottom line: Choosing the right tool is all about balancing power with practicality. You don't always need the most expensive software to get the job done, especially when you're just trying to make your study guides more dynamic and effective.
A Quick Comparison of Video Embedding Tools
Deciding can be tough, so I put together this simple breakdown to help you pick the right tool for your specific study needs.
Tool | Best For | Ease of Use | Cost |
|---|---|---|---|
Adobe Acrobat Pro | Offline videos & professional polish | Steeper learning curve | Paid (check for student discounts) |
MS Word / Google Docs | Quick linking for online videos | Super easy | Free / Included |
LibreOffice | Free, powerful offline embedding | Medium | Free |
Online PDF Editors | Fast edits without software install | Easy to medium | Freemium (basic is free) |
Ultimately, organizing your study materials is about more than just one document. It’s about creating a system that actually works for you. While these tools are great for individual PDFs, the bigger picture involves managing all your content—notes, videos, and slides—in one place. To see how you can apply these principles more broadly, check out our guide on how AI study tools transform learning.
If you’re juggling multiple classes, a tool like Vivora can pull all your scattered materials, including those new PDFs with embedded videos, into a single, organized space. It uses AI to create personalized study guides, so you spend less time organizing and a whole lot more time actually learning.
How to Embed Video in PDF Using Adobe Acrobat Pro
If you've got access to Adobe Acrobat Pro, you’re holding the keys to the most powerful way to embed a video in a PDF. Seriously, check for a student discount if you don't have it—it's a lifesaver. This method lets you place a playable video directly into your notes for true offline access, which is the best way to build a genuinely interactive study guide.
Let's break down exactly how to do it.
This flowchart maps out the main ways you can get video into your PDFs, from pro-level tools to simple online links.

As you can see, Acrobat Pro offers the most direct and feature-rich path. It’s what you want for creating a document that truly stands on its own.
Finding the Right Tools
First thing's first: open your PDF in Acrobat Pro. You'll want to look for the Tools pane, which usually lives on the right side of the screen.
Your mission is to find and add the Rich Media tool. If it's not immediately visible, don't worry. Just use the search bar at the top of the Tools center, type in "rich media," and it will pop right up.
Once you click it, a new toolbar appears at the top of your document. This is your command center for all kinds of interactive elements, but we're just here for the video today.
Placing and Customizing Your Video
Now for the fun part. In that new toolbar, click the Add Video button. Your cursor will change into a crosshair. Simply click and drag on the page to draw a box where you want the video to live. Don't stress about getting it perfect—you can easily resize and move it later.
After you draw the box, a dialog window will open, prompting you to select your video file. This is a critical step because the file type you choose really matters.
For the best results, stick with an MP4 file encoded with H.264. This format is the sweet spot between high quality and small file size, which is essential for keeping your PDF from becoming monstrously large. It's also the most universally compatible format, meaning it has the best shot at playing smoothly on different devices.
Once you’ve picked your file, you'll get a few more options. This is where you can make your study guide look and feel polished.
Set a Poster Image: Instead of a generic black box, you can choose a specific frame from the video or upload a custom image (like a title slide or a key diagram) to act as the video's "cover." This little touch keeps your notes looking clean.
Control Playback: You get to decide how the video plays. You can have it start automatically when the page is opened, but for study guides, setting it to play only when clicked is usually the better move.
Add Playback Controls: You can also choose whether to display a controller bar with play, pause, and volume buttons. I always recommend including this; it just makes the video much more user-friendly.
Once you’ve dialed in your settings, click "OK," and you're done. You've officially learned how to embed video in a PDF like a pro.
Save your file, and you now have a self-contained, interactive study asset that works completely offline. It might seem like a few extra steps at first, but after you do it once, it becomes second nature. This small effort transforms a static document into a dynamic learning tool—a huge win when you’re prepping for a big exam.
If keeping all these new interactive study guides organized feels like the next hurdle, let Vivora do the heavy lifting by pulling all your course materials into one smart, searchable space.
Free Ways to Add Videos to Your PDF Notes
So, Adobe Acrobat Pro is the undisputed heavyweight champion of PDF editing, but let's be real—not everyone has a subscription. Don't sweat it. You can still get video into your PDF notes without spending a dime.
Let’s get into the free methods that absolutely get the job done when you're in a pinch.
There are really two ways to go about this. The first is a ridiculously simple workaround using programs you almost certainly already have. The second involves a slightly more powerful free tool for those times you need true, offline functionality.
The Quick and Dirty Link Method
Honestly, the fastest way to get a "video" into your notes is by using a program like Microsoft Word or even Google Docs. It’s a clever little workaround that’s perfect for linking to online content, like a YouTube explainer or that one TikTok video that finally made a tough concept click.
Here’s how it works:
Find your video: First, just grab the URL of the YouTube, Vimeo, or TikTok video you want to reference in your notes.
Make it look good: You can just paste the link directly into your document, but that looks messy. A much better way is to take a screenshot of the video's thumbnail, drop that image into your doc, and then hyperlink the image itself. It looks way cleaner and feels more like a real video player.
Export to PDF: Once your links are all set, just head to "Save As" or "Download" and choose the PDF format.
And that's it. When you open the PDF, that image or text is now a clickable link that pops the video open in your web browser.
The major catch? You obviously need an internet connection for this to work. But for whipping up quick personal study guides, it’s an absolute lifesaver.
The Real-Deal Embedding Route with LibreOffice
What if you need your video to work offline? Maybe you're studying in a campus library with notoriously spotty Wi-Fi. For that, you'll need something with a bit more muscle.
Enter LibreOffice. It's a completely free and open-source alternative to Microsoft Office that packs some surprisingly powerful features, including actual video embedding.
With LibreOffice, you can directly insert a video file (like an MP4 you've already downloaded) into your document before you export it as a PDF. The process feels a lot like adding a video to a PowerPoint slide. You just insert the media file, drag it into position, and then save the final document as a PDF.
This is your best bet for a free, no-internet-required solution. It gives you that offline playback power the simple link method lacks, making your study guides truly self-contained.
The trade-off is that the interface can feel a little clunkier than MS Word, and you have to be really mindful of your PDF's final file size. A 10-minute HD video clip can easily bloat your PDF, making it a pain to share or open. This method is definitely best for short, targeted clips.
Ultimately, these free methods are fantastic for creating more dynamic study materials on a student budget. And once you've made these awesome interactive notes, the next step is keeping them organized. Instead of letting them get lost in your downloads folder, you can use a tool like Vivora to pull everything—your new PDFs, lecture slides, and video links—into one clear, personalized study guide, saving you from that pre-exam scramble.
Making Sure Your Interactive PDF Actually Works
Okay, so you’ve managed to get a video embedded into your PDF notes. High five! But before you fire it off to your study group, there’s one last, crucial step: making sure it actually works for everyone, on every device.
Creating an interactive PDF is cool, but it’s pretty useless if it’s a massive file that won’t play on your friend’s tablet. Let’s get into the final polish that makes your interactive notes genuinely helpful.
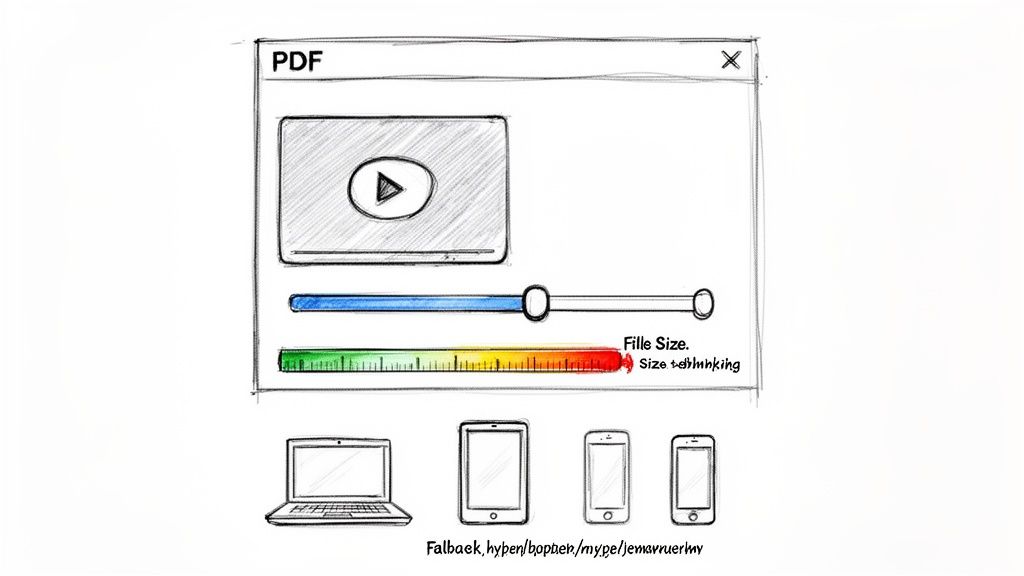
Keep That File Size in Check
The number one rule of sharable PDFs is to watch the file size. Nobody wants to download a 500MB PDF just for one chapter's worth of notes. A huge file is slow to open, a pain to email, and a total nightmare for anyone with a spotty internet connection.
Your video is almost always the main culprit. But don't worry, you don’t have to ditch it. The key is compression.
Before you even think about embedding, run your video through a free tool like HandBrake. It can shrink the file size dramatically without making your video look like it was filmed on a potato. You're not trying to create a cinematic masterpiece—you just need a clear video for your notes.
A good rule of thumb is to keep your final PDF under 25MB. This is the standard attachment limit for most email services, which makes it incredibly easy to share.
Why Your PDF Plays on Your Laptop but Not Your Friend's
Ever sent a file that worked perfectly for you but was a total dud for someone else? Compatibility is a huge deal with interactive PDFs. The hard truth is that not all PDF viewers are created equal.
Adobe Acrobat Reader: This is the gold standard. It's the most likely app to play your embedded video without any drama.
Web Browsers (Chrome, Safari): Most built-in browser PDF viewers are pretty basic. They're great for reading text but often choke when it comes to embedded media.
Third-Party Apps: Random PDF apps on a phone or tablet are a total gamble. It's a coin toss whether they'll support video at all.
Since you can't control what app someone else uses, you should always include a fallback option. The easiest fix is to add a simple hyperlink to the video (e.g., "Link to video") right below your embedded player. That way, if the embed fails, they can still get to the content.
Bringing It All Together
Organizing these new super-powered notes is the final boss battle. Instead of letting your interactive PDFs become just another messy folder, you can bring them into a smarter system. An AI-powered tool like Vivora automatically organizes all your class materials—PDFs with videos, lecture slides, and web links—into one cohesive study space.
The PDF format has come a long way. Between 1993 and 2023, features like embedded media and digital signatures grew by over 650%, while backward compatibility stayed impressively high at over 95%. This reliability is why we still lean on them, and you can learn more about the evolution of the PDF format and its impact.
If you have more questions about how to manage different file types or features, check out the Vivora FAQ page for answers.
Got Questions About Embedding Videos? We’ve Got Answers
So, you’re diving into the world of interactive PDFs. It’s a great way to make your study notes more dynamic, but it's totally normal to hit a few snags. If you’ve ever found yourself staring at a screen wondering why that video you just embedded won't play, trust me, you're not alone.
Let's walk through some of the most common questions and frustrations that come up when you try to embed video in a PDF.
Can I Just Drop in a YouTube or TikTok Video?
This is a big one. The short answer is: it depends entirely on the software you're using.
If you have a subscription to Adobe Acrobat Pro, then yes, you can embed a video using its URL from a site like YouTube. The video will stream right inside your PDF, which is fantastic, but there’s a catch—you (and anyone you share it with) will need a live internet connection to watch it.
On the other hand, free methods like creating a link in Microsoft Word before exporting to PDF usually just create a clickable screenshot. When someone clicks it, the video opens in their web browser. It works, but it’s not a true embed.
For real offline playback—perfect for a study session at a café with spotty Wi-Fi—your best bet is to download the video as an MP4 file first. Then, you can embed the actual file directly into your document.
Help! My Embedded Video Won't Play!
This is easily the number one headache people run into. More often than not, the problem isn't your PDF file; it's the viewer being used to open it.
Here’s the thing: not all PDF readers are created equal. Adobe Acrobat Reader is the gold standard for playing embedded media because, well, Adobe created the feature. It’s built to handle it flawlessly.
Many other viewers, especially the basic ones built right into web browsers like Chrome or Safari, simply don't support rich media playback. They’ll show you the PDF content, but the video player will just be a dead box.
My Go-To Tip: Always add a simple hyperlink to the video (e.g., "Watch on YouTube") right below the embedded player. This is a dead-simple fallback that ensures anyone you share your notes with can access the content, even if their PDF app is as basic as they come.
Will Adding a Video Make My PDF File Gigantic?
It certainly can, but you have more control over this than you think. A video's file size is a direct result of its length and quality. A 30-minute 4K lecture clip will absolutely bloat your PDF into a monster that’s impossible to email.
To keep your file size manageable for easy sharing, you have a couple of levers to pull. First, stick to shorter clips whenever possible. Second, always compress your video before you embed it. For study guides, you rarely need crystal-clear, ultra-HD quality. A clean, compressed video works just as well without turning your notes into a massive download.
Feeling like you're drowning in a sea of digital files, links, and half-finished notes? Vivora is the AI-powered study tool that automatically turns all your scattered class content into a single, organized study guide. Stop juggling files and start focusing on what really matters. Check out https://vivora.ai to see how it can transform your study routine.